
News
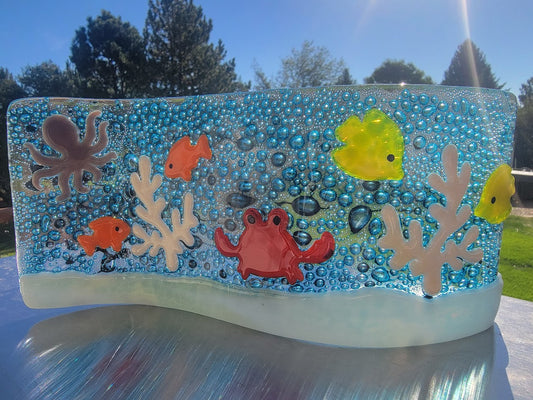
Sea Life Ocean Wave Using Copper Oxide (Also ma...
This is such a fun project. You'll learn to make pretty blue bubbles using copper oxide powder. You'll then decorate and fuse you blank and then slump it onto a...
Sea Life Ocean Wave Using Copper Oxide (Also ma...
This is such a fun project. You'll learn to make pretty blue bubbles using copper oxide powder. You'll then decorate and fuse you blank and then slump it onto a...
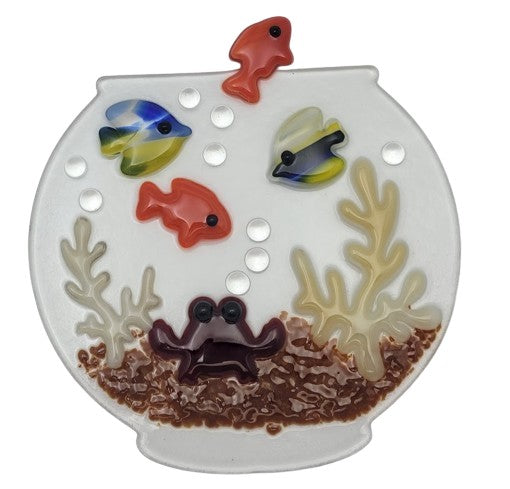
Fish Bowl Project
Ingredients: One fish bowl precut (available in 3mm or 6mm) I used 3mm for this project Frit of your choice for sand. I used chestnut opal brown medium. Small clear dots...
Fish Bowl Project
Ingredients: One fish bowl precut (available in 3mm or 6mm) I used 3mm for this project Frit of your choice for sand. I used chestnut opal brown medium. Small clear dots...

Fused Christmas Tree Ornaments
Start by cutting squares. 3", 2 1/2", 2", 1 1/2" (If you cut four each you'll get eight trees) Now cut those squares in half diagonally to make triangles. Starting...
Fused Christmas Tree Ornaments
Start by cutting squares. 3", 2 1/2", 2", 1 1/2" (If you cut four each you'll get eight trees) Now cut those squares in half diagonally to make triangles. Starting...

Kiln Carved Coasters
What you'll need 2 square feet of compatible glass (I used 96 Icicle because I like the icy look) 1/8" Fiber Paper Cookie Cutters & an ink pad (optional) Instructions:...
Kiln Carved Coasters
What you'll need 2 square feet of compatible glass (I used 96 Icicle because I like the icy look) 1/8" Fiber Paper Cookie Cutters & an ink pad (optional) Instructions:...

Two-Faced Platter or Bowl
What you'll need: 2 10" black System 96 Precut Rounds (or cut your own) 1 package each three colors of Spectrum Chips (or make your own) 1/2" 1 package Colorado...
Two-Faced Platter or Bowl
What you'll need: 2 10" black System 96 Precut Rounds (or cut your own) 1 package each three colors of Spectrum Chips (or make your own) 1/2" 1 package Colorado...