
News

Penguin Ornaments
Pattern (My measurements are a little strange because I cut and then measured. You can adapt this pattern for standard measurements if you want. This gives you a good starting...
Penguin Ornaments
Pattern (My measurements are a little strange because I cut and then measured. You can adapt this pattern for standard measurements if you want. This gives you a good starting...
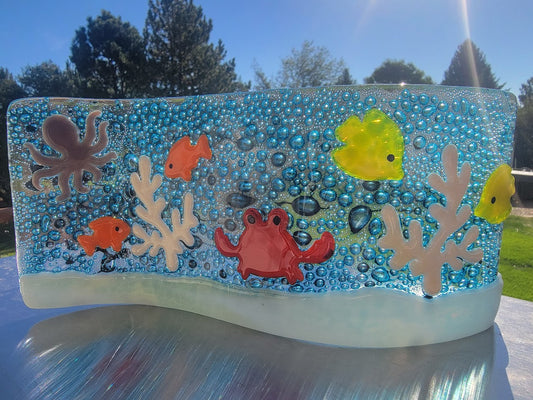
Sea Life Ocean Wave Using Copper Oxide (Also ma...
This is such a fun project. You'll learn to make pretty blue bubbles using copper oxide powder. You'll then decorate and fuse you blank and then slump it onto a...
Sea Life Ocean Wave Using Copper Oxide (Also ma...
This is such a fun project. You'll learn to make pretty blue bubbles using copper oxide powder. You'll then decorate and fuse you blank and then slump it onto a...
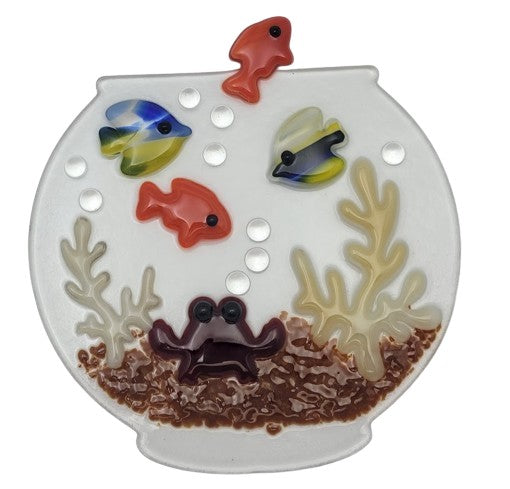
Fish Bowl Project
Ingredients: One fish bowl precut (available in 3mm or 6mm) I used 3mm for this project Frit of your choice for sand. I used chestnut opal brown medium. Small clear dots...
Fish Bowl Project
Ingredients: One fish bowl precut (available in 3mm or 6mm) I used 3mm for this project Frit of your choice for sand. I used chestnut opal brown medium. Small clear dots...
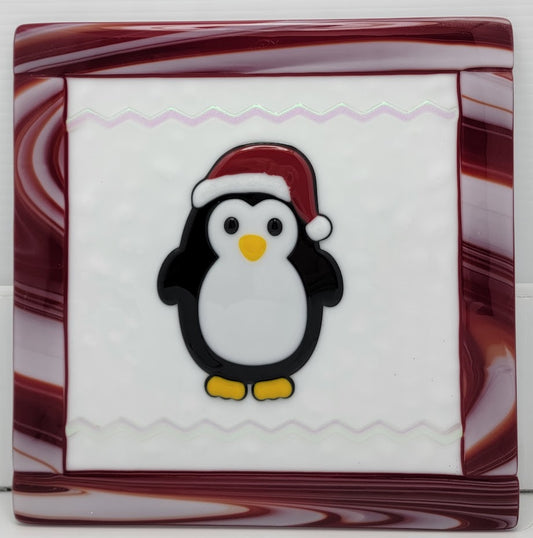
Project Guide Penguin Holiday Plate
This adorable 10" plate goes together in minutes and is sure to be a treasured gift or part of your holiday decorations. Materials all 96 COE: Top: 10x10" (I flipped...
Project Guide Penguin Holiday Plate
This adorable 10" plate goes together in minutes and is sure to be a treasured gift or part of your holiday decorations. Materials all 96 COE: Top: 10x10" (I flipped...

Project Guide: Ikea Lantern Inserts
This project utilizes the Borrby lantern (black or white) in either small or large. These currently sell on Ikea for $7.99 and $14.99. 1. Gently manipulate the tabs to...
Project Guide: Ikea Lantern Inserts
This project utilizes the Borrby lantern (black or white) in either small or large. These currently sell on Ikea for $7.99 and $14.99. 1. Gently manipulate the tabs to...
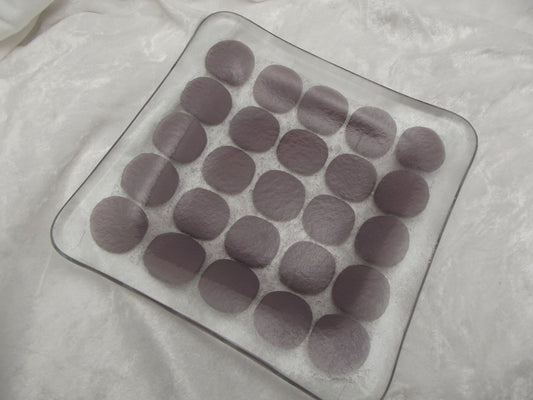
Project Guide: Dots Plate
Base: 6x6" (any color)Second layer border: two 1/2" x 6" strips; two 1/2" x 5" stripsSecond layer dots: number and color of choiceSecond layer filler: medium frit in choice of...
Project Guide: Dots Plate
Base: 6x6" (any color)Second layer border: two 1/2" x 6" strips; two 1/2" x 5" stripsSecond layer dots: number and color of choiceSecond layer filler: medium frit in choice of...